1.添加动态背景
1.1 修改_layout.swig
路径
next/layout/_layout.swig
说明
在 < /body>之前添加代码(注意不要放在< /head>的后面)
代码
1
2
3
{% if theme.canvas_nest %} <script type ="text/javascript" src ="//cdn.bootcss.com/canvas-nest.js/1.0.0/canvas-nest.min.js" > </script > {% endif %}
1.2 修改next配置文件
路径
/next/_config.yml
添加如下:
1.3 配置线条
如果线条太多,可以进行如下配置
替换代码1 2 3 4 {% if theme.canvas_nest % } <script type="text/javascript" color="0,0,255" opacity='0.7' zIndex="-2" count="99" src="//cdn.bootcss.com/canvas-nest.js/1.0.0/canvas-nest.min.js"></script> {% endif % }
配置项说明
color :线条颜色, 默认: ‘0,0,0’;三个数字分别为(R,G,B)
opacity: 线条透明度(0~1), 默认: 0.5
count: 线条的总数量, 默认: 150
zIndex: 背景的z-index属性,css属性用于控制所在层的位置, 默认: -1
2.点击出现桃心效果
下载js
love.js
配置1 2 3 。将love.js文件放到路径/themes/next/source/js/src里面, 然后打开\themes\next\layout\_layout.swig文件,在末尾 (在前面引用会出现找不到的bug)添加以下代码:
1 2 <script type ="text/javascript" src ="/js/src/love.js" > </script >
3.修改文章内链接文本样式
修改文件 themes\next\source\css_common\components\post\post.styl ,在末尾添加如下css样式,:
1 2 3 4 5 6 7 8 9 10 11 // 文章内链接文本样式 .post-body p a { color : #0593d3 ; border-bottom : none; border-bottom : 1px solid #0593d3 ; &:hover { color : #fc6423 ; border-bottom : none; border-bottom : 1px solid #fc6423 ; } }
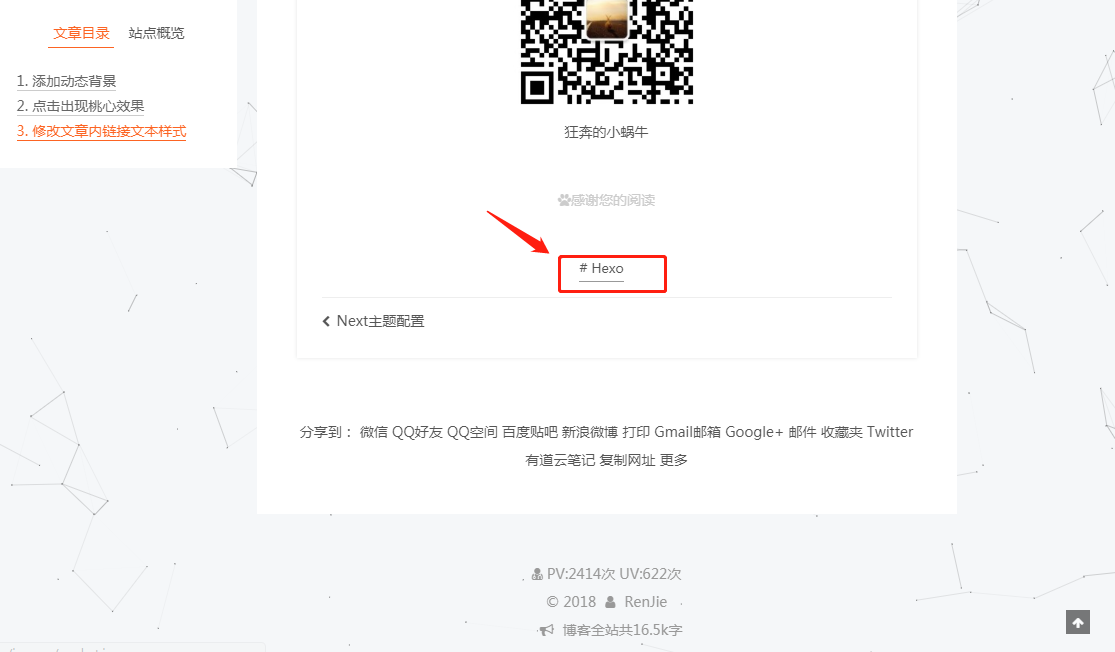
4.修改文章底部的那个带#号的标签
修改模板/themes/next/layout/_macro/post.swig,搜索 rel=”tag”>#,将 # 换成
5.在每篇文章末尾统一添加“感谢您的阅读”标记
在路径 \themes\next\layout_macro 中新建 passage-end-tag.swig 文件,并添加以下内容:
1 2 3 4 5 <div> {% if not is_index %} <div style="text-align:center;color: #ccc;font-size:14px;"><i class="fa fa-paw"></i>感谢您的阅读</div> {% endif %} </div>
接着打开\themes\next\layout_macro\post.swig文件,在post-body 之后, post-footer 之前添加如下画红色部分代码(post-footer之前两个DIV):
1 2 3 4 5 <div> {% if not is_index %} {% include 'passage-end-tag.swig' %} {% endif %} </div>
然后打开主题配置文件(_config.yml),在末尾添加:
1 2 3 passage_end_tag: enabled: true
6.修改作者头像并旋转
打开\themes\next\source\css_common\components\sidebar\sidebar-author.styl,在里面添加如下代码:
1 2 3 4 5 6 7 8 9 10 11 12 13 14 15 16 17 18 19 20 21 22 23 24 25 26 27 28 29 30 31 32 33 34 35 36 37 38 39 40 41 42 43 44 45 46 47 48 49 50 51 52 53 54 55 56 57 58 59 60 .site-author-image { display : block; margin : 0 auto; padding : $site-author-image-padding; max-width : $site-author-image-width; height : $site-author-image-height; border : $site-author-image-border-width solid $site-author-image-border-color; border-radius : 80px ; -webkit-border-radius : 80px ; -moz-border-radius : 80px ; box-shadow : inset 0 -1px 0 #333s f; -webkit-transition : -webkit-transform 1.0s ease-out; -moz-transition : -moz-transform 1.0s ease-out; transition : transform 1.0s ease-out; } img :hover { -webkit-transform : rotateZ (360deg ); -moz-transform : rotateZ (360deg ); transform : rotateZ (360deg ); } @-webkit-keyframes play { 0% { -webkit-transform : rotateZ (0deg ); } 100% { -webkit-transform : rotateZ (-360deg ); } } @-moz-keyframes play { 0% { -moz-transform : rotateZ (0deg ); } 100% { -moz-transform : rotateZ (-360deg ); } } @keyframes play { 0% { transform : rotateZ (0deg ); } 100% { transform : rotateZ (-360deg ); } }
7.博文压缩
在站点的根目录下执行以下命令:
1 2 npm install gulp -g npm install gulp-minify-css gulp-uglify gulp-htmlmin gulp-htmlclean gulp --save
在站点的根路径新建gulpfile.js,内容如下:
1 2 3 4 5 6 7 8 9 10 11 12 13 14 15 16 17 18 19 20 21 22 23 24 25 26 27 28 29 30 31 32 33 var gulp = require ('gulp' );var minifycss = require ('gulp-minify-css' );var uglify = require ('gulp-uglify' );var htmlmin = require ('gulp-htmlmin' );var htmlclean = require ('gulp-htmlclean' );gulp.task ('minify-css' , function ( return gulp.src ('./public/**/*.css' ) .pipe (minifycss ()) .pipe (gulp.dest ('./public' )); }); gulp.task ('minify-html' , function ( return gulp.src ('./public/**/*.html' ) .pipe (htmlclean ()) .pipe (htmlmin ({ removeComments : true , minifyJS : true , minifyCSS : true , minifyURLs : true , })) .pipe (gulp.dest ('./public' )) }); gulp.task ('minify-js' , function ( return gulp.src ('./public/**/*.js' ) .pipe (uglify ()) .pipe (gulp.dest ('./public' )); }); gulp.task ('default' , [ 'minify-html' ,'minify-css' ,'minify-js' ]);
生成博文是执行 hexo g && gulp 就会根据 gulpfile.js 中的配置,对 public 目录中的静态资源文件进行压缩。
8.侧边栏社交小图标设置
打开主题配置文件(_config.yml),搜索social_icons:,图标库
9.主页文章添加阴影效果
打开\themes\next\source\css_custom\custom.styl,向里面加入:
1 2 3 4 5 6 7 8 // 主页文章添加阴影效果 .post { margin-top : 60px ; margin-bottom : 60px ; padding : 25px ; -webkit-box-shadow : 0 0 5px rgba (202 , 203 , 203 , .5 ); -moz-box-shadow : 0 0 5px rgba (202 , 203 , 204 , .5 ); }
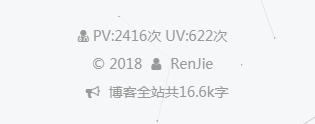
10.在网站底部加上访问量
打开\themes\next\layout_partials\footer.swig文件,在顶部加入如下代码:
1 2 3 4 5 6 7 8 9 10 11 12 <script async src="https://dn-lbstatics.qbox.me/busuanzi/2.3/busuanzi.pure.mini.js"></script> <div class="powered-by"> <i class="fa fa-user-md"></i> <span id="busuanzi_container_site_pv"> PV:<span id="busuanzi_value_site_pv"></span>次 </span> <span id="busuanzi_container_site_uv"> UV:<span id="busuanzi_value_site_uv"></span>次 </span> </span>
11.网站底部字数统计
安装插件,npm install hexo-wordcount –save
然后在/themes/next/layout/_partials/footer.swig文件尾部加上:
1 2 3 4 <div class="theme-info"> <div class="powered-by"></div> <span class="post-count">博客全站共{{ totalcount(site) }}字</span> </div>
12.实现统计功能
安装插件,npm install hexo-wordcount –save
1 2 3 4 5 6 post_wordcount: item_text: true wordcount: true min2read: true
13.网站加载进度条
修改next配置文件,将pace:false改成true
1 2 3 4 5 6 7 8 9 10 11 12 13 14 15 16 17 18 19 20 pace: true pace_theme: pace-theme-minimal
14.隐藏网页底部powered By Hexo / 强力驱动
打开themes/next/layout/_partials/footer.swig,使用””隐藏之间的代码即可,或者直接删除。
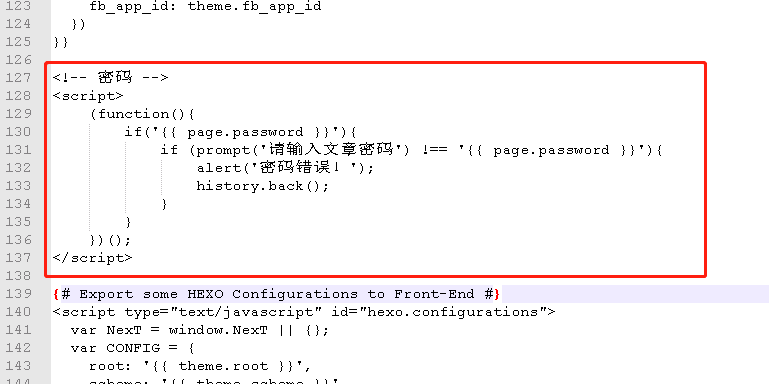
15.文章加密访问
打开themes->next->layout->_partials->head.swig文件,在以下位置插入这样一段代码:
1 2 3 4 5 6 7 8 9 10 <script > (function ( if ('{{ page.password }}' ){ if (prompt ('请输入文章密码' ) !== '{{ page.password }}' ){ alert ('密码错误!' ); history.back (); } } })(); </script >
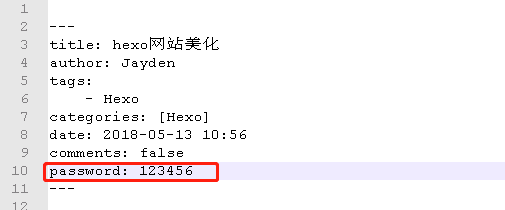
新建文章的是否需要加入password字段:
16.添加jiathis分享
修改主题配置文件,将jiathis: false改成true
17.修改字体大小
打开\themes\next\source\css\ _variables\base.styl文件,将$font-size-base改成16px,如下所示:
18.侧边栏推荐阅读
主题配置文件
1 2 3 4 5 6 7 8 links_icon: link links_title: 推荐阅读 links_layout: block links: 极客学院wiki: http://wiki.jikexueyuan.com/
19.自定义鼠标样式
打开themes/next/source/css/_custom/custom.styl,在里面写下如下代码
1
2
3
4
5
6
7
// 鼠标样式 * { cursor : url ("http://om8u46rmb.bkt.clouddn.com/sword2.ico" ),auto!important } :active { cursor : url ("http://om8u46rmb.bkt.clouddn.com/sword1.ico" ),auto!important }
20.相关参考文档